Installing Privoxy beside Tor

Privoxy is tools for configuring proxy on your system. It's needed for anonymous concepts. So, your identity when you using internet keeping from the other person who want to determine what your activity. Usually, i using Privoxy with Tor. Tor is providing the bouncing method with international network, and privoxy will forward it into your local machine with HTTP method. So, if you just use Tor, you can't connect to your local network. Then after you installed Privoxy beside Tor, you will be connected into your local network.
Let's begin. The first assume, you running on Kali Linux and you have an installed Tor in your system (see how to install Tor). If you have the default repository of Kali Linux, you need to add the Debian or Kali Main repository (in this tutorial i will use Debian Main repository), open the sources.list.
root@h3:~# vim /etc/apt/sources.list
Add the new source of the repository below, save and exit.
deb http://kambing.ui.ac.id/debian wheezy main
Running update and install Privoxy.
root@h3:~# apt-get update && apt-get install privoxy
After Privoxy installed, remove the Debian Main repository from your sources.list (it's to keep your system for damage condition).
Before configuring Privoxy, backup the default configuration Privoxy fist.
root@h3:~# cp /etc/privoxy/config /etc/privoxy/config.bak
Open the configuration file of Privoxy.
root@h3:~# vim /etc/privoxy/config
Find listen-address on the Access Control and Security Section. Change
listen-address localhost:8118
With
listen-address 127.0.0.1:8118
Next, find forward socks4 and socks5 on the Forwarding Section. Un-comment the row below.
forward-socks5 / 127.0.0.1:9150
forward 192.168.*.*/ .
forward 10.*.*.*/ .
forward 127.*.*.*/ .
forward localhost/
See the forward socks5, the port must be same with the port of Tor you're setup, here i running Tor on port 9150 (see how to running Tor on static port). Alternatively, if you confusing about it, you can download the config file here. Then replace the old config with the config file which you have downloaded.
For collaborating Privoxy with Tor, open the directory of Tor. Edit start-tor-browser with your favourite text editor.
root@h3:~# vim start-tor-browser
Add the command on the first and second row of this file with command to running Privoxy, so Privoxy will automatically running when you're running Tor.
/etc/init.d/privoxy stop
/etc/init.d/privoxy start
Go to the end of that file, add the command to stopping Privoxy, it will stopping Privoxy when you're stopping Tor.
/etc/init.d/privoxy stop
Save and exit. Now, go to the Network Configuration, i'm using Iceweasel. Set up the proxies of Iceweasel below.
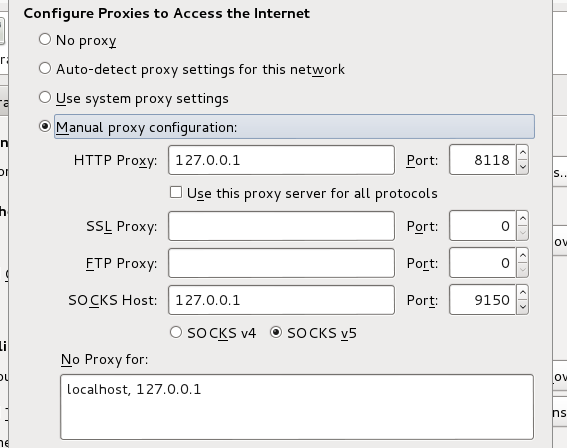
Configuring Proxy of Iceweasel
Now, go to the address bar. Type http://check.torproject.org, when the color of image is green, your Tor is worked.
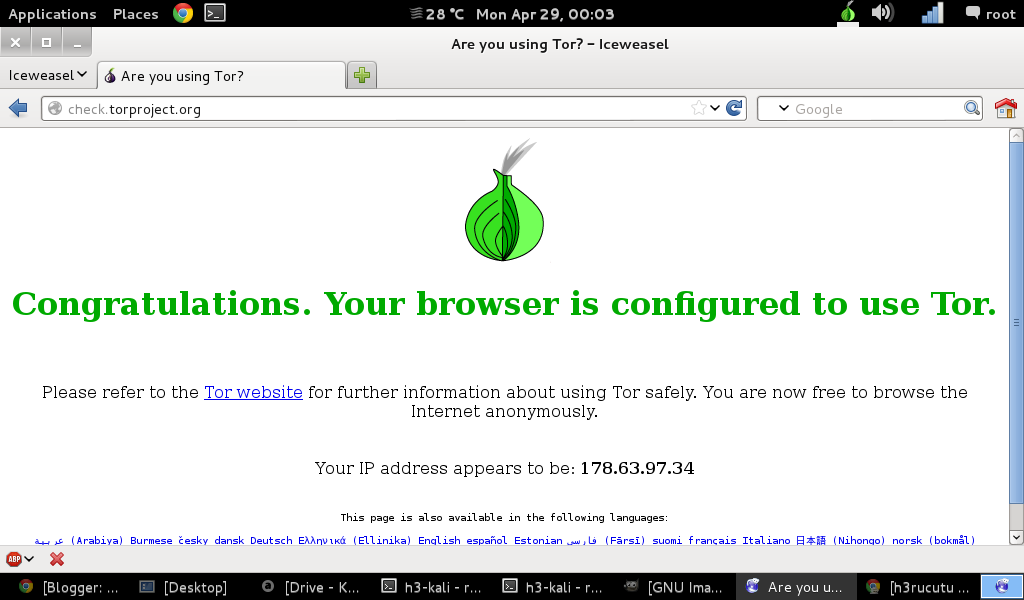
Tor Worked
Then go to http://config.privoxy.org, when the Privoxy Information opened, your Privoxy is worked too.
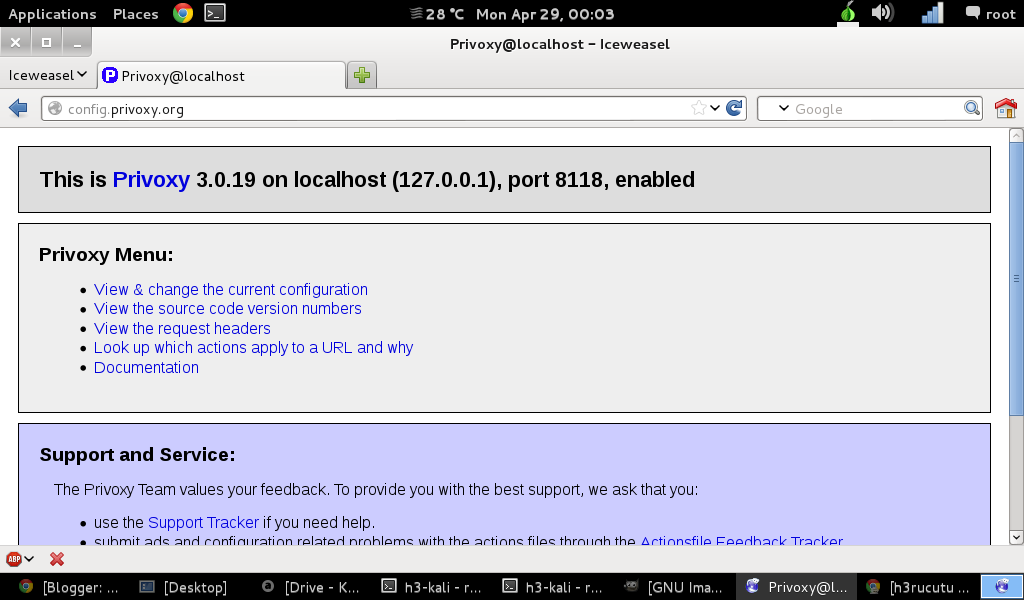
Privoxy Worked
Finally Privoxy and Tor is working together perfectly.

Comments

Popular posts from this blog

Indonesian Dark Wordlist

Indonesian Dark Wordlist adalah proyek baru dari Unlisted Developer yang menghasilkan kumpulan kata (wordlist) berbasiskan pada Kamus Besar Bahasa Indonesia (KBBI) untuk berbagai keperluan, misalnya teknik bruteforce atau aircracking . Kami masih melihat proyek-proyek sebelumnya masih tidak jelas kelanjutan proyeknya dalam membuat Wordlist, maka dari itulah kami membuat proyek ini sebagai jembatan kepada teman-teman lain yang membutuhkan wordlist yang lengkap tanpa harus bersusah-susah meng- generate . Mengingat proyek ini masih dalam tahap awal, maka banyak sekali kelemahan-kelamahan yang ada, sehingga kami mengharapkan kritik dan saran yang membangun, supaya kami bisa berbenah dalam setiap tambahan waktu. Selain itu, kami juga masih membuka peluang kepada teman-teman yang ingin bergabung dalam proyek ini, silahkan menghubungi saya via email atau tinggalkan komentar pada tulisan ini. Tidak ada syarat ketentuan khusus, hanya syarat umum yaitu bisa mengoperasikan komputer (mengerti...

Bypassing Nokia Maps N9

Nokia N9 have maps application, both of Nokia Maps and Nokia Drive are related one to other. But the same problem with Nokia Drive on Nokia N9 also occur in Nokia Maps (see here ). Nokia Maps also need logged in Nokia Account before you can use Nokia Maps. So I think the same way with bypassing Nokia Account in Nokia Drive will be succeed too in Nokia Maps. The same step can be read on my previous post here , until preparing the configuration Nokia Drive download. Okay let's go! First, make sure you have installed Filebox and setting to show hidden files and show root filesystem. Open browser on your N9 and download Modified Nokia Maps Configuration here . Don't press clear when the download has finished, just tap Done. Go to Filebox, and navigate to /home/user/MyDocs/Downloads , you'll found Maps.conf there, copy and paste this file into /home/user/.config/Nokia . But I recommend you if there's existing Nokia Maps Configuration backup it into Maps.conf.bak the ...

Bypassing Nokia Drive N9

Nokia N9 contains maps application bundled by Nokia with offline maps, but to access Drive application you need to have Nokia Account and you must login in your N9. Before Nokia Account has been shutdown by Microsoft (see here ) there's no problem to using Nokia Maps on N9, but after 25th, April 2015 Nokia Account no longer can be accessed. So maybe you think that your N9 can't help you to assist when you driving or find place around the world. Nokia Account requirement Here, I'll show you to bypassing Nokia Account requirement to access Nokia Drive on N9 Harmattan. So you don't need to have Nokia Account logged on your N9 to access Nokia Drive. Below is the step by step to bypassing by modify Nokia Drive configuration on Harmattan. First, you'll need installed Filebox on your Harmattan N9 (see here  for installer and this  for installation). Open Filebox and make sure you have change settings to Show root filesystem and Show hidden files. Filebox Sett...